Requirements:
- Scalextric or Carrera device.
- Computer.
- Arduino UNO.
- Protoboard.
- EMOTIV EPOC.
How to:
Step 1 (Hardware):
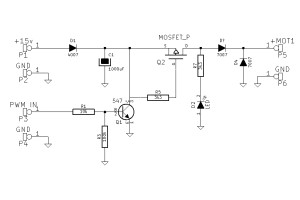
Analyze the electrical input and output given by the Scalextric. That’s important because we’re not sure if the pad was only a Resistance (it was) and the rails polarity must be known. With that in mind, the solution given was to join the input of the track with the rails, in a way that the given power will go directly into the car.
Then we designed an electrical circuit that gives the power controlled by a “pulse train”. This way, when more high state is applied, more power is given to the track. As the Analogic output for Arduino gives exactly that (it’s not a real analog output, it gives a pulse train with high-low states), it’s perfect for this project.
With the prototype tested, we designed an integrated peripheral to do that job for Arduino, and tested in “the garage”, it works really well.
Step 2 (Software):
Install Processing (www.processing.org/) and Arduino (http://arduino.cc/) programming environment. In addition, some extra libraries for processing are needed, “arduino.cc for processing” (http://playground.arduino.cc/Interfacing/Processing) and “OscP5” (http://www.sojamo.de/libraries/oscP5/). The default folder for libraries in processing is $/Users/{YOUR USER}/Documents/Processing/Libraries/.
Now the EEG actions must be trained with the EmotivControlPannel API. To move the car we used the PUSH action. Then to communicate the PC with Processing we used the “Mind Your OSCs” application (you can find it at the Emotiv market for free), and to communicate Processing with the Arduino, the uploaded program at it must be a Standard Firmata (you can found it in the Arduino IDE example projects, no coding abilities needed) so the Hardware enters in a “slave mode” for the PC.
This way when the PUSH action is detected, the intensity is sent as OSC message to our Processing code where the Arduino analog output is enabled. As this happens, the track gets voltage and the car runs. When the signal is not detected, the signal for our analog output is set to 0, stopping the car.


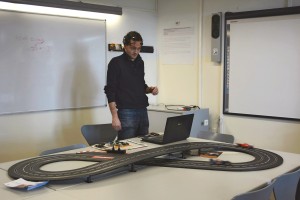
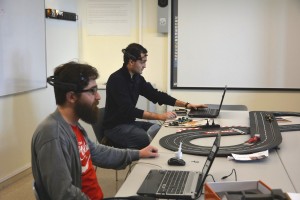
[…] ¿Cómo funciona? El aparato clave es el Emotiv EPOC, un electroencefalograma portátil con el cual han construido un puente entre un sistema de Slot Car y placa Arduino. Este proyecto consta de dos partes integradas entre si por un “programa” que los comunica. Por un lado, el Scalextric está conectado a una placa controlada por Arduino (que es una placa programable que gestiona piezas electrónicas). Por otro lado, el EEG (electroencefalograma) envía los datos a tiempo real al ordenador. Este ordenador guarda en la memoria una señal entrenada, y la compara con la actual por tal de “adivinar” en qué está pensado la persona que lo lleva puesto. Si la onda actual se parece a la que el ordenador ha captado en el momento del entrenamiento, el Arduino da corriente al ciruito activando el coche. Si el ordenador deja de detectar la similitud de esta señal… el coche se para. Si alguien siente curiosidad por las instrucciones, las podéis encontrar aquí (en inglés, eso sí): http://virgili.org/?page_id=40 […]
Que buen artículo. Soy un foro del modelismo y de los coches rc. Gracias por la información.